Connecting to your WebDAV directory can be accomplished through Microsoft’s Windows Explorer. This mounts the WebDAV folder as a mapped drive and allows you to view, edit, and delete files from the remote web server from your computer.
- Open Windows File Explorer.
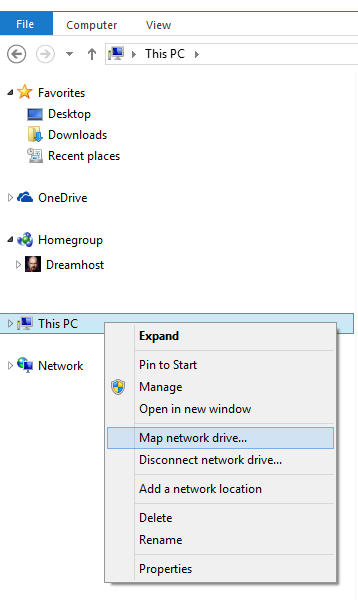
- Right-click 'This PC'.
- From the dropdown, select Map network drive.... The Map Network Drive window opens:
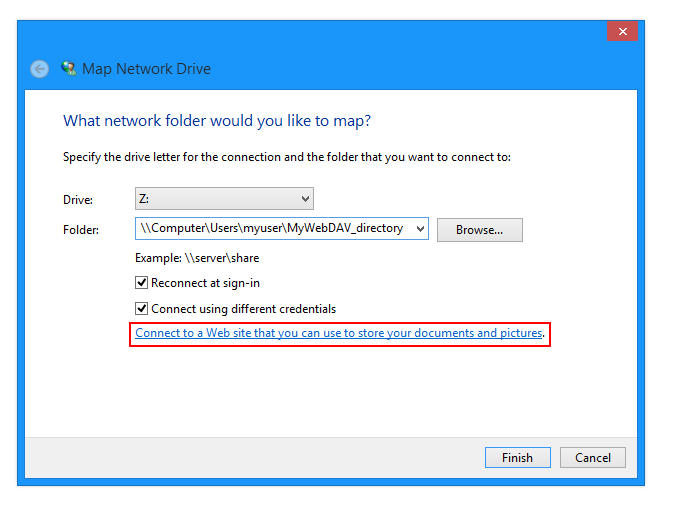
- Enter the following:
- Drive: Select the drive letter you want to map your WebDAV connection to.
- Folder: This is the folder on your local computer where you'll add/edit WebDAV files.
- Check the boxes:
- Reconnect at sign-in – This allows the connection to your WebDAV to be restored if you restart your computer.
- Connect using different credentials
- Click the Connect to a Web site that you can use to store your documents and pictures link.
- Click the Next button.
- Click Choose a custom network location and then click the Next button.
- In the 'Internet or network address' field, enter your domain's URL with the WebDAV directory at the end of it. For example: http://example.com/webdav
- Enter your WebDAV username and password in the pop-up box, and then the OK button.The box titled 'Type a name for this network location' is already populated, and you can change this if you like.
- Click the Next button.
- Click the Finish button.
Your WebDAV folder appears as a mapped drive in Windows Explorer, and you can immediately add, edit, or delete files and directories using the Windows File Explorer.
If you still have trouble connecting to your WebDAV directory, you may have to update the Basic Authentication Level in the registry. View the following page for further information on how to access the registry:
To change the Basic Authentication Level:
- Locate the following directory:
HKEY_LOCAL_MACHINE\SYSTEM\CurrentControlSet\Services\WebClient\Parameters
- Locate value BasicAuthLevel.
- The Value data box should be set to 2.
- If the value is not 2, right-click it and select 'Modify'.
- Change it to 2.